In this tutorial, we’ll create a simple sample application using Sitemesh. You’ll see that how easy it is to use Sitemesh and what tremendous features it provides. Sitemesh removes your burden of including layout related files in each and every page of your application. We won’t explore all the features of Sitemesh in this tutorial, we’ll only look at basic usage of Sitemesh.
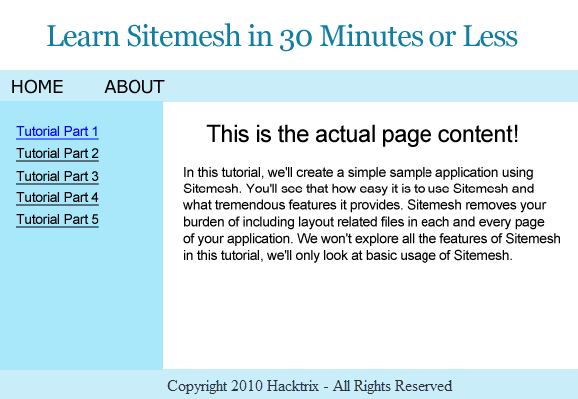
First lets take a look at what sitemesh does. Normally websites have a common layout for all the pages. There is a header, navigation on top or left or right and a footer. Generally in such a site, we use jsp:include on every page to include the header, navigation and footer. This creates maintenance problems. By using Sitemesh, we don’t need to include the header, navigation and footer into each and every page. We create only the content of the page, Sitemesh adds the header, navigation etc to the page. Lets say this is the look of almost all pages on my site
As with most sites, there is a header, a navigation at the top, a navigation on the left, the content goes on the right and there is a footer at the bottom. If we use sitemesh, we’ll create a template page which will have the layout related to the site. That template will be applied to every page of the site. So we’ll create a page that will contain the header, navigations and footer like this,
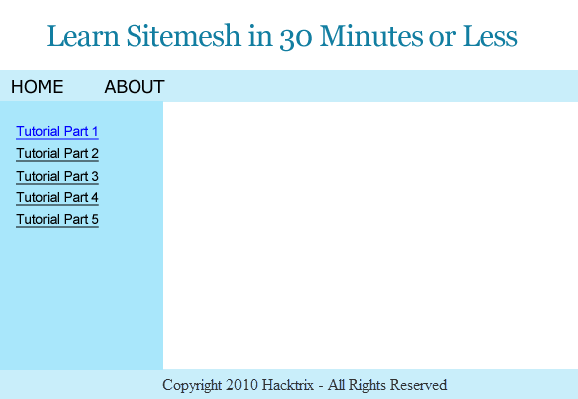
This template page is the decorator that will decorate other pages. Content will be added to this page and then the whole page will be sent to the client. Lets see how to do this in Sitemesh.
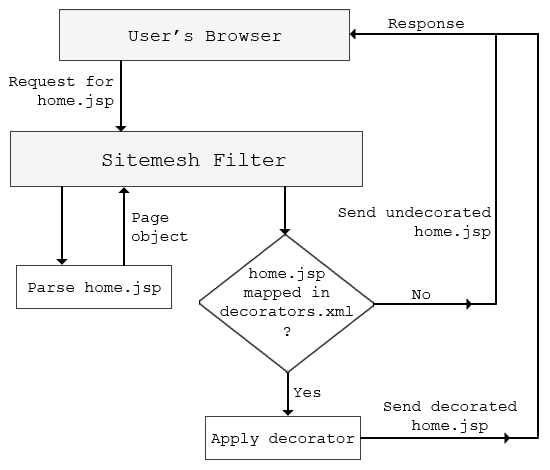
The way Sitemesh work is it uses a filter to intercept every request that is received by the application which we might want Sitemesh to process. Sitemesh uses a configuration document (decorators.xml) to see which layout or template (called decorator) to apply to the request (if required). Suppose we open home.jsp from our browser. Sitemesh parses the home.jsp and stores it into a Page object. Then Sitemesh looks into the decorators.xml to see if it has to apply a decorator to home.jsp page. If we’ve not defined a decorator for home.jsp, then sitemesh sends the parsed home.jsp as response without applying any decorator. If Sitemesh is configured to apply a decorator to the home.jsp, then Sitemesh sends the request to the decorator page (along with the Page object which contains the parsed home.jsp). The decorator renders the actual output that is sent to the browser. If this doesn’t make any sense right now, then it will once we progress so hold on.
To start using Sitemesh, you’ll need to include Sitemesh’s library into your application. You can download Sitemesh jar file from here. Include the sitemesh-xxx.jar into your web application. To use sitemesh, you’ll have to configure Sitemesh’s filter in your web.xml. This can be done as follows,
<filter-name>sitemesh</filter-name>
<filter-class>com.opensymphony.sitemesh.webapp.SiteMeshFilter</filter-class>
</filter>
<filter-mapping>
<filter-name>sitemesh</filter-name>
<url-pattern>*.jsp</url-pattern>
</filter-mapping>
In our code, we’ve configured Sitemesh to intercept every request to jsp pages. Sitemesh will apply a decorator (template) only to request which we configure it to be applied to.
Now lets create an index.jsp page that we’ll decorate using Sitemesh. This page is a very simple page,
<!DOCTYPE HTML PUBLIC "-//W3C//DTD HTML 4.01 Transitional//EN"
"http://www.w3.org/TR/html4/loose.dtd">
<html>
<head>
<title>Sitemesh Example</title>
<meta name="keywords" content="sitemesh" />
</head>
<body>
<h2>This is the actual page content</h2>
In this tutorial, we'll create a simple sample application
using Sitemesh. You'll see that how easy it is to use Sitemesh
and what tremendous features it provides. Sitemesh removes
your burden of including layout related files in each and
every page of your application. We won't explore all the
features of Sitemesh in this tutorial, we'll only look at basic
usage of Sitemesh.
</body>
</html>
As you can see, this page doesn’t have anything fancy. It just contains a heading and some text. On its own this page will render like this in the browser,
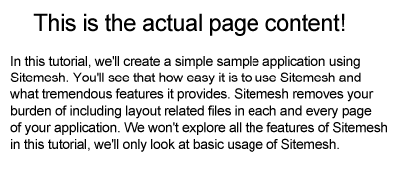
We’ll now use Sitemesh to apply a template to this page so that we have a header, navigation and footer on this page. Sitemesh is configured through a configuration file named decorators.xml which is placed in the WEB-INF directory. This configuration file will tell Sitemesh which decorator (i.e. template) to apply to which request. In our example, we’ll use only a single decorator that will be applied to all the pages. This is how our Sitemesh configuration file looks like,
<decorators>
<decorator name="simple" page="/WEB-INF/decorators/base_layout.jsp">
<pattern>*</pattern>
</decorator>
</decorators>
The root node in decorators.xml is decorators. It contains declarations of all the decorators. We’ve configured a single decorator named simple. The decorator will use base_layout.jsp as the template to decorate pages. Since we don’t want this page to be served directly, we’ve put it inside WEB-INF directory. The pattern tag is used to configure which pages will this decorator decorate. Since we’ve used * as the pattern, this decorator will be applied to all pages. Let’s see the code for base_layout.jsp file. To use features of Sitemesh, this page will include Sitemesh tag library like this,
prefix="dec" %>
This tag library will allow us to use pieces of the page that is being decorated in this page. Like if we want to get the content of the <title></title> tag of the original page (the page that we are decorating), we’ll use <dec:title /> tag. To get the contents of the decorated page, we’ll use <dec:body /> tag. A list of Sitemesh tags is given here. After the taglib directive base_layout.jsp contains this code,
<head>
<meta http-equiv="Content-Type" content="text/html; charset=UTF-8">
<title><dec:title default="Web Page" /></title>
<link rel="stylesheet" type="text/css" href="styles/style.css" />
<dec:head />
</head>
<body>
<!--body code-->
</body>
</html>
There are two Sitemesh tags we’ve used here. The first tag i.e. <dec:title /> will write the <title> of the decorated page. The default attribute of <dec:title /> is useful if there is no <title> in the decorated page. So if the decorated page has a <title> tag, then that will be used as the title of this template otherwise “Web Page” will be the title of the page in the browser. The second tag we use is <dec:head /> which will write the contents of the <head></head> tag of the decorated page except for the <title>. In the index.jsp page that we saw earlier, there was a <meta /> tag in the page so that will be written here. This is the body of base_layout.jsp page,
<div id="bodyWrapper">
<div id="header">
Learn Sitemesh in 30 Minutes or Less
</div>
<div id="navigation">
<a href="#">HOME</a>
<a href="#">ABOUT</a>
</div>
<div id="pageBody">
<div id="sidebar">
<a href="#">Tutorial Part 1</a><br/>
<a href="#">Tutorial Part 2</a><br/>
<a href="#">Tutorial Part 3</a><br/>
<a href="#">Tutorial Part 4</a><br/>
<a href="#">Tutorial Part 5</a>
</div>
<div id="content">
<dec:body />
</div>
</div>
<div id="footer">
Copyright 2010 HackTrix - All Rights Reserved
</div>
</div>
Most of this is plain HTML except for <dec:body /> which will include the body of the decorated page. The HTML is easy to understand, there is a header, two navigations and one footer. This page is styled using the style.css that we included in the header (its code is not important to understand Sitemesh so we’ve skipped it).
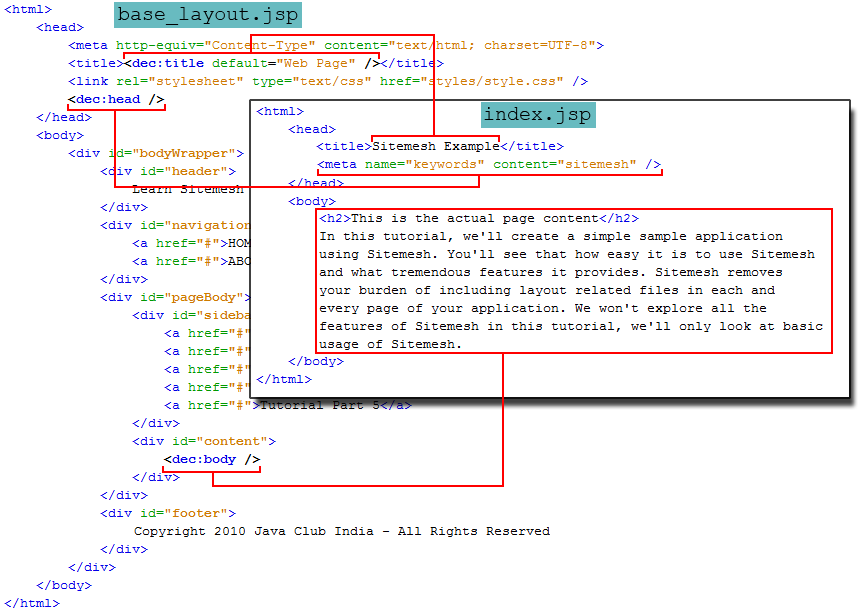
This is it, now when we open index.jsp in our browser, sitemesh will apply base_layout.jsp to our request. So we’ll get a nice and decorated page which has header, navigations, the original content of index.jsp and a footer. This image will help you understand which parts of index.jsp are placed where in base_layout.jsp
You can download the war file for the project here.
